
From Shell & Core to Ready Office: Commercial Interior Design Process for Projects
From Shell & Core to Ready Office: Commercial Interior Design Process for Projects
In fast-paced business hubs like Mumbai, commercial offices are rarely handed over as finished spaces. Most developers deliver shell & core offices—open, unfinished spaces that require complete interior planning before they can function as productive workplaces. Transforming such a space into a fully operational office demands a structured, well-coordinated commercial interior design process.
This blog explains the step-by-step commercial interior design process from shell & core to ready office, helping business owners, CXOs, and facility managers understand what to expect, how to plan, and how to avoid costly mistakes.
What Is a Shell & Core Office?
A shell & core office is a bare commercial unit provided by the developer. It typically includes:
External walls and façade
Structural slab and columns
Basic fire systems
Entry points and common area access
It does not include:
Internal partitions
Flooring, ceilings, or lighting
HVAC distribution
Electrical, data, or plumbing layouts
Because everything inside must be built from scratch, shell & core offices offer maximum flexibility—but only when handled by an experienced commercial interior designer.
Step 1: Requirement Analysis & Space Assessment
The first and most critical step is understanding how the office will function.
Key considerations:
Number of employees (current and future)
Nature of work (corporate, IT, consulting, finance, etc.)
Departments and adjacencies
Meeting rooms, cabins, collaboration areas
Brand identity and client-facing needs
A detailed site assessment is conducted to study slab heights, column grids, fire norms, HVAC provisions, and building regulations. This ensures the design aligns with technical and statutory constraints.
SEO keyword naturally used: commercial interior design process
Step 2: Space Planning & Test Fit Layouts
Once requirements are clear, designers create test-fit layouts to check feasibility.
This stage focuses on:
Efficient workstation planning
Clear circulation paths
Logical zoning (work, meeting, services)
Optimal use of natural light
Multiple layout options may be explored before finalizing the most efficient one. Proper space planning at this stage directly impacts productivity and long-term scalability.
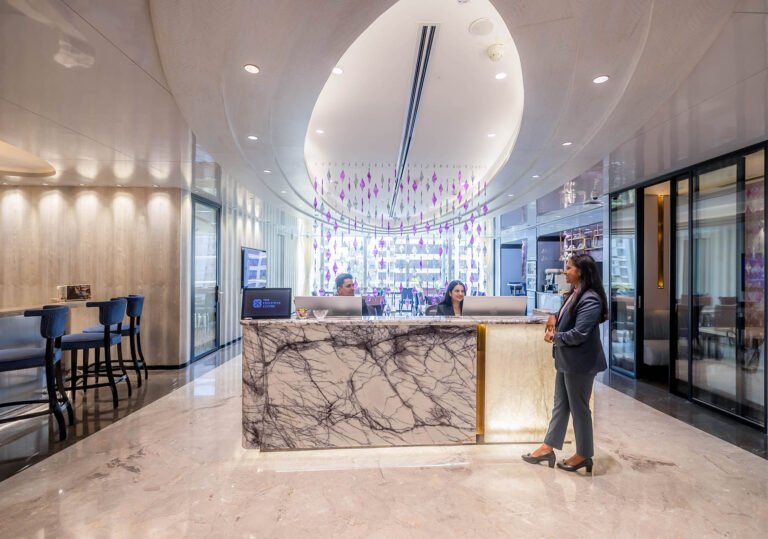
Step 3: Concept Design & Brand Integration
Concept design defines how the office will look and feel.
Elements covered:
Interior theme and color palette
Brand integration through materials and graphics
Mood boards and reference images
Design philosophy aligned with company culture
For corporate offices, this stage ensures the interiors reflect professionalism, credibility, and brand values—especially important for client-facing spaces like reception areas and boardrooms.
SEO keyword: commercial office interior design
Step 4: Detailed Design & Technical Drawings
This is the backbone of execution. The concept is converted into working drawings that contractors can build accurately.
Drawings include:
Partition and furniture layouts
Electrical and lighting plans
HVAC and ducting coordination
Data and server room layouts
Plumbing and pantry details
Ceiling and flooring details
Precise documentation reduces errors, controls costs, and avoids site delays.
Step 5: Statutory Approvals & Compliance
Commercial interiors must comply with local authority and building regulations.
Common approvals required:
Fire NOC
HVAC and electrical load approvals
Building management permissions
Local authority submissions (where applicable)
Experienced commercial interior designers manage these approvals efficiently, ensuring the project proceeds without legal or safety risks.
Step 6: Project Costing & Budget Finalization
Once designs are frozen, a detailed BOQ (Bill of Quantities) is prepared.
Budget planning covers:
Civil and partition works
Electrical and lighting systems
HVAC execution
Furniture and finishes
IT and security systems
Transparent costing helps clients make informed decisions and prevents scope creep during execution.
SEO keyword: commercial interior cost planning
Step 7: Execution & Site Coordination
This phase converts drawings into reality.
Execution typically follows this sequence:
Site mobilization and marking
Civil and partition works
Electrical, HVAC, and plumbing installation
Ceiling and flooring works
Furniture manufacturing and installation
Painting, finishes, and final detailing
Strong project management is essential to coordinate vendors, maintain timelines, and ensure quality control.
Step 8: Quality Checks, Testing & Snag Closure
Before handover, detailed inspections are conducted.
This includes:
Electrical and lighting testing
HVAC performance checks
Fire safety compliance
Furniture and finish quality review
Snag list closure
This stage ensures the office is safe, functional, and ready for occupancy.
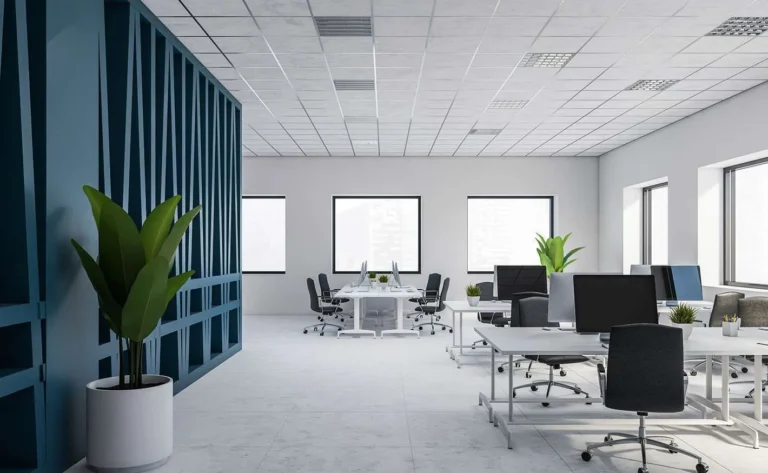
Step 9: Final Handover & Ready Office Delivery
The project concludes with a ready-to-move-in office, complete with:
All services operational
Approved compliance documents
As-built drawings
Warranty and maintenance information
A smooth handover ensures the client can start operations without disruption.
Why a Structured Commercial Interior Process Matters
Skipping steps or rushing design decisions often leads to:
Budget overruns
Poor space utilization
Compliance issues
Frequent post-handover modifications
A structured commercial interior design process ensures efficiency, compliance, and long-term value, especially for premium business districts like BKC.
Conclusion
Transforming a shell & core office into a fully functional workplace is a complex journey that requires planning, coordination, and expertise. From initial space assessment to final handover, each stage plays a vital role in delivering an office that supports productivity, brand identity, and business growth.
Partnering with experienced commercial interior designers ensures your office is not just visually appealing—but operationally efficient and future-ready.